I was sitting on my living room floor three years ago, surrounded by three different types of wall anchors, a half-empty coffee, and a mounting bracket that seemed designed specifically to spite me. I had spent forty minutes staring at a blank patch of drywall, paralyzed by the fear that I was about to ruin my apartment by failing at something as basic as how to install a shelf. We see these perfectly styled, minimalist floating shelves on Instagram and think it’s about the aesthetic, but the truth is much messier: it’s actually about not losing your mind when the drill hits a stud that isn’t where it’s supposed to be.
In this guide, I’m skipping the professional contractor jargon and getting straight to what actually matters. I’ll walk you through the real-world tools you need, how to avoid that dreaded “crooked shelf” look, and the quick fixes for when things don’t go according to plan. We aren’t aiming for a showroom-ready masterpiece here; we are just trying to get your books and plants off the floor and into a spot where they actually belong. Let’s get your gear up on the wall so you can finally stop tripping over it.
Table of Contents
Guide Overview
Tools & Supplies
- Drill/Driver for creating holes and driving screws
- Level to ensure the shelf is straight
- Pencil for marking placement locations
- Measuring tape for accurate spacing
- Shelf and brackets 1 set
- Wall anchors and screws 1 pack
- Wall plugs (if using drywall) 1 pack
Step-by-Step Instructions
- 1. First things first, grab your shelf and those brackets and hold them up against the wall exactly where you want them. I know, it feels a bit awkward, but don’t just eyeball it from across the room. Use a pencil to mark the holes, and if you have a level, use it now. Trust me, nothing ruins my mood faster than a shelf that looks like it’s slowly sliding toward the floor.
- 2. Once you’ve marked your spots, it’s time to play detective with your walls. You really want to find a stud—that solid wooden beam behind the drywall—because that’s where the real strength lives. If you don’t have a stud finder, give the wall a few light taps; a hollow sound means nothing, but a solid thud is exactly what you’re looking for.
- 3. If you can’t hit a stud (which happens to the best of us in older apartments), don’t panic. Just grab some heavy-duty drywall anchors. These are your best friends when you’re working with nothing but plaster and hope. Just make sure you drill the pilot hole slightly smaller than the anchor so it actually grips the wall instead of just spinning in circles.
- 4. Now, go ahead and drill those holes. If you’re using a power drill, keep it steady and don’t try to rush through it. If you’re just using a manual screwdriver because that’s what’s in your junk drawer, embrace the forearm workout. Once the holes are clear, pop your anchors in and give them a firm tap with a hammer until they’re flush with the wall.
- 5. Line up your brackets with the anchors or studs you’ve prepared and drive your screws in. This is the part where you want to be careful not to over-tighten and strip the screw head, especially if you’re working with softer wood. I always keep my multi-tool handy just in case I need to adjust something on the fly.
- 6. Finally, set the shelf on top of the brackets and give it a little wiggle. If it feels sturdy and isn’t wobbling like a newborn deer, you’re golden. Go ahead and add your stuff—books, plants, whatever—but maybe start with the lighter items first. It’s much easier to add weight gradually than to fix a collapsed shelf in the middle of the night.
The Essential Tools for Shelf Installation Without the Overkill
Look, you don’t need a professional contractor’s workshop to get this done, but you also don’t want to end up with a pile of books on the floor because you skipped the basics. My rule of thumb? Don’t skimp on the measuring tools. A decent level is non-negotiable; there is nothing more soul-crushing than finishing a project only to realize your new shelf is tilting like the Leaning Tower of Pisa. If you’re working with a floating design, leveling a floating shelf becomes your new full-time job, so grab a spirit level before you even think about picking up a drill.
As for the heavy lifting, the most important thing to understand is the difference between drilling into drywall vs studs. If you’re planning on some heavy-duty shelf mounting—think heavy ceramics or a full row of hardcovers—you absolutely need to find those wooden studs. I always keep a stud finder in my kit because relying solely on plastic anchors is a recipe for a midnight disaster. Once you know where the support is, you can decide which shelf bracket types will actually hold the weight you need without looking like they’re trying too hard.
Drilling Into Drywall vs Studs Making It Actually Stay
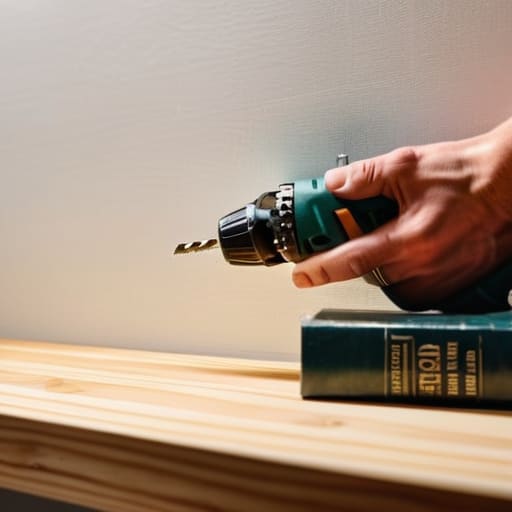
Here is the real deal: if you want your shelf to actually hold anything more than a single air plant, you need to understand the difference between drilling into drywall vs studs. Drywall is basically just compressed chalk; it’s fine for a lightweight photo frame, but if you try to hang a collection of heavy cookbooks on it using just plastic anchors, you’re going to end up with a hole in your wall and a pile of books on the floor. I’ve learned the hard way that aiming for the studs is the only way to ensure long-term stability.
If you can’t find a stud, don’t panic—that’s what heavy-duty drywall anchors are for. But honestly, if you’re planning on heavy duty shelf mounting, I highly recommend investing in a decent stud finder. I know, it feels like one more thing to buy, but it saves so much heartbreak (and drywall patch kits) in the long run. Just a quick tip: once you find that wood, double-check your measurements. There is nothing more frustrating than realizing your beautiful new shelf is half an inch off-center because you were rushing the process.
Five Little Things That’ll Save Your Sanity (and Your Walls)
- Double-check your level—and I mean actually use a level, not just your “eye test.” There is nothing more soul-crushing than finishing a project only to realize your favorite books are slowly migrating toward the floor because the shelf is tilted two degrees to the left.
- Don’t overthink the decor. I know the temptation to buy a whole new set of matching ceramic vases is real, but wait until the shelf is actually up and you’ve lived with it for a week. You’ll realize you actually need a place for your keys or a stray charging cable more than you need a sculptural bowl.
- If you’re feeling nervous about the weight, start small. You don’t need to turn your new shelf into a heavy-duty library on day one. Test it out with a few light items first to make sure your anchors are holding steady before you go full “collector mode.”
- Keep a scrap piece of cardboard or a small rug nearby while you work. It’s a tiny move, but it catches the inevitable dust and drywall grit that falls when you’re drilling, which means way less cleanup for you once the heavy lifting is done.
- Plan for the “life clutter” factor. When you’re deciding where the shelf goes, think about what you’ll actually put there in a month. If it’s in a high-traffic area, make sure it’s not going to be a magnet for stuff you’ll just end up knocking over.
The Reality Check
“Forget about that perfectly staged, gravity-defying floating shelf you saw on Instagram; if you find the studs, use the right anchors, and get it level enough that your coffee mug doesn’t slide off, you’ve already won the day.”
Audrey Lin-McCallum
You’ve Got This
At the end of the day, installing a shelf isn’t about mastering advanced carpentry; it’s just about knowing which hardware to use and making sure you aren’t trusting a tiny plastic anchor to hold up your entire collection of heavy cookbooks. We covered the essentials: picking the right tools, understanding the difference between hitting a stud and just drilling into drywall, and making sure your measurements actually line up before you commit to those permanent holes. It might feel like a lot of technical jargon right now, but once you have the right foundation in place, the actual physical work is surprisingly straightforward. Just take it one measurement at a time, and don’t be afraid to double-check your level.
I know that looking at a pile of brackets and a power drill can feel a bit overwhelming when you just wanted a place to put your plants. But remember, the goal here isn’t to create a showroom-perfect display that looks like it was installed by a professional contractor. The goal is to create a space that works for you. Once that shelf is up and holding your stuff, you’ll realize that the small win of fixing something yourself is way more satisfying than any curated photo you’ve ever scrolled past. Now, go grab that multi-tool and get to work.
Frequently Asked Questions
What if I don't have a stud finder? Can I still get this to stay up?
Honestly? You can totally wing it, but you’ve got to be smarter about it. If you don’t have a stud finder, grab a strong magnet. Run it along the wall; if it sticks, you’ve likely found a screw or a nail in a stud. If that fails, don’t risk it with heavy stuff. Just use high-quality drywall anchors—the screw-in kind are my go-to—and let the hardware do the heavy lifting instead of guessing.
How do I stop my drill from slipping and making a giant, ugly hole in my wall?
Ugh, the dreaded “wall crater.” We’ve all been there. Honestly, the easiest fix is to stop trying to dive straight in. Grab a piece of painter’s tape and stick it right where you’re drilling; it gives the bit a little extra grip so it doesn’t skitter across the paint. If you want to be even safer, use a nail to tap a tiny pilot hole first. It’s a tiny extra step, but it saves a massive headache.
My shelf is a little bit crooked—is there a quick way to fix it without taking the whole thing down?
Ugh, the dreaded tilt. I’ve been there, usually right when I’m halfway through a coffee. Honestly, if it’s just a tiny wobble, try shimmying a small piece of cardboard or a felt furniture pad under the low corner. It’s a quick, “invisible” fix. But if it’s noticeably crooked, you might have to loosen the screws just a hair, nudge it into place, and tighten them back up. It’s a bit of a gamble, but worth a shot!
