I was sitting in my tiny kitchen last Tuesday, trying to photograph a tray of heirloom tomatoes I’d just harvested from my windowsill garden, when I realized I was doing that thing again. I was squinting at my screen, fighting with a dozen different editing apps and trying to find the “perfect” angle, only to end up with a photo that looked nothing like the actual, vibrant life in front of me. We’ve been sold this lie that you need a thousand-dollar DSLR and a degree in lighting theory to capture a decent moment, but honestly, that’s just exhausting. If you’re tired of the technical jargon and just want to know how to take better phone photos without turning your life into a full-time production, I hear you.
I’m not here to give you a lecture on shutter speeds or suggest you buy expensive gear you’ll never use. Instead, I want to share the actual, low-effort systems I use to make my daily life look as good as it feels. We’re going to focus on practical tweaks—like using the light you already have and cleaning that smudge off your lens—that actually move the needle. My goal is to help you capture real, functional memories that fit into your actual schedule, not some curated, filtered fantasy.
Table of Contents
Mastering Mobile Photography Lighting Techniques Without the Studio Setup

Look, I get it. You see these incredible, moody shots on Instagram and think you need a three-point lighting kit and a studio lease to get anywhere close. You don’t. Most of the time, the best mobile photography lighting techniques involve nothing more than moving three feet to the left. I’ve spent way too many afternoons squinting at my screen trying to fix a grainy photo, only to realize I was fighting against a harsh overhead light. Instead, hunt for “soft” light—think a window on a cloudy day or that golden hour glow right before the sun dips. It’s much more forgiving on your sensor and saves you a massive headache later.
If you’re stuck indoors with zero natural light, don’t reach for your phone’s built-in flash; it usually makes everything look flat and a little bit clinical. Instead, grab a desk lamp or even a cheap white piece of paper to bounce light back onto your subject. This simple trick is one of my favorite ways of improving smartphone image quality without spending a dime. It softens those nasty shadows and makes your subject actually pop, making the whole process feel a lot less like a chore and more like a quick win.
Smart Smartphone Composition Rules for Real Life Chaos

Once you’ve nailed the lighting, you’re probably going to face the biggest hurdle of all: the actual mess in front of you. Whether it’s a pile of laundry in the corner of your living room or a crowded cafe table, real life is rarely “Instagram-ready.” This is where learning a few basic smartphone composition rules becomes a total lifesaver. Instead of trying to clean the whole room, try the “Rule of Thirds.” Turn on the grid lines in your settings and place your subject along those lines rather than dead center. It instantly makes a cluttered shot look intentional rather than accidental.
If you’re dealing with a particularly chaotic background, don’t panic. I’ve found that getting physically lower to the ground or changing your angle can completely hide the junk you don’t want in the frame. If you have a newer device, leaning into portrait mode photography tips—like using a shallow depth of field—is your best friend here. By blurring out that messy bookshelf behind your coffee cup, you create a sense of focus that makes even the most disorganized corner look like a professional shot.
Five Quick Fixes for Photos That Don't Look Like Total Chaos
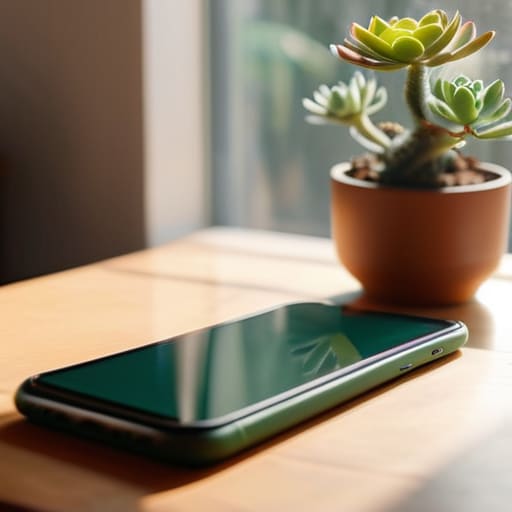
- Clean your lens. I know, it sounds incredibly basic, but if you’ve been carrying your phone in a bag or just touching it all day, there’s probably a layer of finger grease over that glass. Give it a quick wipe with your shirt or a microfiber cloth before you snap the shot—it’s the fastest way to stop your photos from looking blurry and “dreamy” in a bad way.
- Lock your focus and exposure. Don’t just point and pray. Tap the screen where you want the focus to be, and then—this is the important part—hold your finger down until you see the “AE/AF Lock” pop up. Once it’s locked, you can slide your finger up or down to manually adjust the brightness so your subject doesn’t end up looking like a silhouette.
- Stop using digital zoom. It’s tempting to pinch-to-zoom when you can’t get closer to something, but you’re actually just cropping the image and losing all that crisp detail. If you can’t physically move closer, just take the photo from where you are and crop it later in an editing app. Your pixels will thank you.
- Turn on the grid lines. Most phones have this in the camera settings, and it’s a total lifesaver. It helps you keep your horizons straight (no more slanted oceans!) and makes it much easier to follow those composition rules we talked about without having to do mental math every time you frame a shot.
- Embrace the “burst” mode for moving subjects. If you’re trying to capture a pet, a kid, or even just a gust of wind in your garden, don’t try to time the perfect single click. Hold down the shutter button to take a burst of photos. It’s much easier to pick one winning shot out of twenty than it is to nail a single frame of something that won’t sit still.
The Reality Check
“Forget about chasing that perfectly curated, studio-lit aesthetic you see on your feed; your phone is a tool for capturing your actual life, so focus more on finding the best light in your messy living room than on trying to hide the mess.”
Audrey Lin-McCallum
Stop Chasing the Aesthetic

At the end of the day, taking better photos isn’t about owning the latest iPhone Pro Max or spending three hours setting up a tripod in your living room. It’s about the small, practical adjustments: leaning into the natural light that’s already hitting your table, using a bit of the rule of thirds to cut through the visual clutter, and refusing to let a messy background ruin the moment. You don’t need a professional studio to capture something meaningful; you just need to look at your environment a little differently and realize that the tools you already have in your pocket are more than enough to get the job done.
My biggest piece of advice? Don’t let the pursuit of a “perfect” shot stop you from actually living the moment. I used to spend way too much time fiddling with settings while my friends were mid-laugh, and honestly, those blurry, imperfect shots are usually the ones I treasure most later on. Use these tips to sharpen your eye, but remember that the goal is to document your life, not to perform for an algorithm. Build a system that works for your schedule, take the shot, and then get back to the real world.
Frequently Asked Questions
My photos always look grainy or "noisy" when I'm shooting indoors at night; how do I fix that without buying a fancy camera?
That graininess—or “noise,” as the pros call it—is basically your phone’s sensor panicking because it’s starving for light. To fix it without dropping a fortune on a DSLR, stop using your flash; it usually just creates harsh, unflattering shadows. Instead, lean into whatever light is actually there. If you’re at dinner, move closer to a lamp or a candle. Even a tiny bit of extra light helps your phone keep the image clean and crisp.
Do I actually need to spend money on those clip-on lenses and expensive editing apps, or can I get a good result with just the basics?
Honestly? Save your money. I’ve spent way too much time chasing that “pro” look with fancy clip-on lenses, only to realize they usually just add more clutter to my bag. Most of those expensive apps are overkill for what we actually need. Stick to your phone’s native settings and a free, straightforward editor like Snapseed. If you can master light and composition, a $1,000 camera won’t fix a bad photo.
How do I stop my photos from looking blurry when I'm trying to capture my pets or kids moving around?
The “blurry kid/pet” struggle is real—I’ve spent more time than I’d like to admit trying to capture a sleeping toddler only to end up with a smudge. The trick isn’t better gear; it’s managing your shutter speed. Tap your screen to focus on them, then slide the brightness (exposure) bar down slightly. This forces the camera to take a faster shot. Also, if you’re indoors, get near a window. More light equals less blur.
