I was halfway through a much-needed cup of coffee when I heard that dreaded skritch—the sound of my favorite vintage mid-century coffee table meeting the corner of a heavy ceramic mug. My first instinct was to panic and start Googling “professional furniture restoration,” thinking I’d just ruined a piece I love. But here’s the thing: we’ve been conditioned to believe that a single mark means a piece is broken or needs a full, expensive refinish. Honestly, knowing how to fix scratched wood doesn’t require a workshop full of industrial sanders or a massive budget; sometimes, it just requires a little bit of patience and the right bit of elbow grease.
In this guide, I’m skipping the overly complicated tutorials that assume you own a professional workshop. Instead, I’m sharing the low-effort, high-impact methods I use in my own small apartment to tackle everything from light surface scuffs to those annoying deep gouges. We’re going to walk through a few realistic ways to get your furniture looking decent again without turning your living room into a construction zone. My goal is to help you find a solution that actually fits into your afternoon, so you can get back to enjoying your home.
Table of Contents
Guide Overview
Tools & Supplies
- Sandpaper (various grits for smoothing)
- Microfiber cloth (for cleaning debris)
- Wood filler (small container for deep scratches)
- Wood stain marker or touch-up pen (one per color match)
- Furniture wax or polish (small tin for finishing)
Step-by-Step Instructions
- 1. First things first, grab a clean cloth and some mild soap to wipe down the area. You don’t want to be rubbing old dust, pet hair, or kitchen grease into the wood grain while you’re trying to work. Once it’s dry, take a quick look at the scratch to see if it’s just a surface-level scuff or if you can actually feel the depth with your fingernail.
- 2. If it’s just a shallow, annoying scratch, skip the heavy tools and go straight for the walnut trick. Take a raw walnut—not a piece of candy, a real nut—and rub the meat of it directly over the scratch. The natural oils will seep into the wood and help camouflage the mark almost instantly. It’s one of those low-effort wins I live for.
- 3. For something a bit more stubborn that the nut couldn’t handle, it’s time to break out the fine-grit sandpaper. You’ll want something around 220 or 320 grit; anything coarser and you’ll end up making a bigger mess than you started with. Always sand with the grain, never across it, or you’ll leave permanent swirl marks that are much harder to fix than the original scratch.
- 4. If the scratch is deep enough to have actually removed the color, you’re going to need a furniture repair marker or a wax filler stick. I usually keep a small assortment in my utility drawer for exactly this reason. Match the color as closely as possible—and honestly, aim a little lighter rather than darker, because you can always add more color, but you can’t easily take it away.
- 5. Once you’ve applied your filler or marker, take a soft, lint-free cloth and buff the area gently. You want to blend the edges of the repair so there isn’t a weird, harsh line where the “fix” meets the original finish. It’s all about making the transition look as seamless as possible so it doesn’t scream “I repaired this.
- 6. If the wood looks a little dull or “thirsty” after your sanding, finish it off with a tiny bit of furniture wax or oil. A quick application will restore that healthy sheen and help protect the spot you just worked on. Just remember: less is more here. You want a soft glow, not a greasy patch that attracts every speck of dust in the room.
Quickly Removing Surface Scratches From Timber

If you’re dealing with those shallow, annoying marks that haven’t actually gouged the wood, you don’t need to break out the heavy-duty sandpaper just yet. Sometimes, removing surface scratches from timber is as simple as a bit of friction and some patience. I’ve found that a handful of walnuts works wonders; the natural oils in the nut can often “heal” a light scratch by filling the grain and blending the color back in. It sounds a bit like a kitchen hack, but it’s a lifesaver when you’re in a rush and don’t want to commit to a full repair.
For something slightly more substantial, try a bit of buffing out wood imperfections using a soft cloth and a tiny amount of furniture wax. The goal here isn’t to strip the piece down, but to smooth out the texture so the light doesn’t catch on the damage. If you do find that the scratch is a bit deeper, don’t panic. You can move toward more formal wood filler application techniques, but for those everyday scuffs, a little elbow grease and a gentle touch usually do the trick without ruining the original character of the piece.
Matching Wood Stain Colors for Real Life Results
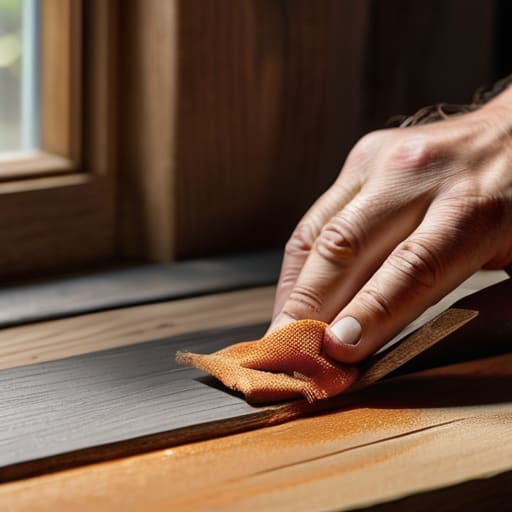
Here is the tricky part: finding a color that actually blends in rather than looking like a dark blotch on your favorite coffee table. When you’re matching wood stain colors, my best advice is to avoid the temptation of buying the “perfect” shade straight off the shelf. Most wood has a unique undertone—some lean warm and orange, others are cool and grayish. I always grab a few small, inexpensive stain samples and test them on a hidden area, like the underside of a chair or the back of a drawer. It’s much better to spend ten minutes testing than to realize you’ve accidentally turned a light oak piece into a mahogany mess.
If you find the color is just slightly off, don’t panic. You can actually layer different stains to build depth, which is a much more effective way of restoring wood finish to its former glory. Think of it like mixing paint; a little bit of a lighter tint can soften a heavy stain that looks too aggressive. Just remember to work in small, controlled strokes. It’s all about those incremental improvements that make the repair disappear into the natural grain.
A Few Pro-Tips Before You Dive In
- Test your stain on a hidden spot first—like the underside of a chair or a back corner—because what looks like “walnut” in the bottle often looks like “dark mud” once it hits your actual floor.
- Don’t go overboard with the sandpaper; if you sand too deep, you’re no longer fixing a scratch, you’re starting a full-blown refinishing project that you definitely don’t have time for today.
- Clean the area thoroughly with a damp cloth and let it dry completely before you start; if there’s dust or old wax trapped in the groove, your fix is just going to sit on top instead of sinking in.
- Work with the grain, always. I know it’s tempting to scrub back and forth to get it done faster, but sanding against the grain is the easiest way to turn a tiny scratch into a permanent mess.
- Keep a little bit of your matching stain in a small jar nearby. Sometimes a tiny “dab and blend” approach works much better than trying to paint a whole section at once.
## A Note on Perfection
“A scratch on a dining table isn’t a failure of maintenance; it’s just proof that your home is actually being lived in. Don’t aim for a showroom finish—just aim for a fix that lets you get back to using the piece without it bothering you.”
Audrey Lin-McCallum
Making Peace with the Marks
At the end of the day, whether you’re buffing out a shallow surface scratch with a bit of walnut or diving into a full stain match to hide a deeper gouge, the goal is the same: making your furniture feel functional again. You don’t need a professional workshop or a degree in woodworking to tackle these little imperfections. By taking a few minutes to assess the depth of the damage and choosing the right tool for the job—be it a simple furniture marker or a bit of sandpaper—you’ve effectively reclaimed your space from that feeling of “it’s broken, so I can’t use it.”
I know it’s easy to look at a scuffed coffee table and see a failure, but I see it differently. Those marks are just evidence that your home is actually being lived in. We spend so much time chasing a showroom-perfect aesthetic that we forget the best homes are the ones where things are used, loved, and occasionally repaired. Don’t let a few scratches make you feel like you need to replace everything. Fix what you can, embrace the character, and remember that a home is meant for living, not just for looking at.
Frequently Asked Questions
What if the scratch is actually a deep gouge that goes all the way through the wood?
Okay, now we’re getting into the heavy lifting. If you’ve hit a gouge that’s actually carved into the grain, a quick buff won’t cut it. You’ll need to fill it. Grab some wood filler that matches your stain, pack it into the crater, and level it off. It’s a bit more tedious, but don’t stress—once it dries and you sand it smooth, it’ll blend right back into the rest of your piece.
Can I use these same fixes on my inexpensive IKEA furniture, or do I need real wood for this to work?
Honestly? It’s a bit of a different beast. Since most IKEA pieces are particle board with a thin veneer or a paper laminate, you have to be way more careful. If you sand too hard, you’ll hit the “guts” of the furniture and it’s game over. For those, skip the heavy sanding and try a furniture touch-up marker or even a bit of wax instead. It’s about damage control, not a full restoration.
How do I know if I should try a quick touch-up or if I'm looking at a full-on sanding and refinishing job?
Honestly, I always use the “fingernail test.” Run your nail across the scratch. If it’s just a surface scuff that doesn’t catch, a quick touch-up kit or some wax will do the trick. But if your nail dips into a deep groove, or if the wood feels splintery and raw, you’re looking at a bigger project. Don’t feel bad about that, though—sometimes the deep stuff actually needs the full sanding to feel right again.
